Last month, I challenged myself to build a fully functional budget tracking app in just 48 hours—without writing a single line of code. I’m not a developer. I’m a designer who’s dabbled in app concepts but never had the technical skills to bring them to life. But with AI tools transforming the app development landscape in 2025, I thought: why not give it a shot?
The result? A working mobile app with user authentication, database integration, and a polished interface that I submitted to both the App Store and Google Play. The entire process took exactly 47 hours and 32 minutes, and it cost me less than $100. If I can do this, anyone can
In this comprehensive guide, I’ll walk you through every step of the process, from initial research to publishing your app. You’ll discover the exact tools I used, the prompts that worked (and those that didn’t), and the shortcuts that saved hours of frustration
What You’ll Create
By following this tutorial, you’ll build a complete mobile application with :
- User authentication (sign up, login, password reset)
- Full CRUD functionality (Create, Read, Update, Delete)
- Cloud database integration
- Push notifications
- Professional UI/UX design
- Responsive layouts for all screen sizes
- Ready-to-publish app files for iOS and Android
The best part? You don’t need any coding experience. Just patience, creativity, and a willingness to learn new tools
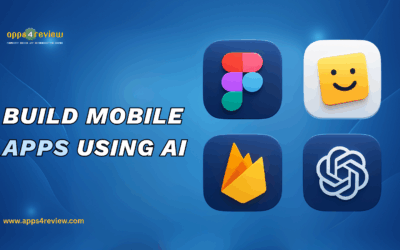
Tools You’ll Need (All Have Free Tiers)
Before we dive in, here are the tools we’ll be using :
- FigJam AI – For brainstorming and user research (https://www.figma.com/figjam/)
- Mobbin – For design inspiration and competitor analysis (https://mobbin.com/)
- Figma with AI features – For UI design (https://www.figma.com/)
- FlutterFlow – For building the actual app (https://flutterflow.io/)
- Firebase – For backend and database (https://firebase.google.com/)
- ChatGPT – For content generation and problem-solving (https://chat.openai.com/)
Total cost for this project: $0-30 for free tiers, $70-100 if you want premium features for faster development
Step 1: User Research with FigJam AI (4 Hours)

The foundation of any successful app is understanding your users. I spent the first four hours researching, planning, and defining exactly what my app would do
Brainstorming Your App Idea
Open FigJam and create a new file. The AI assistant in FigJam can help you generate mind maps automatically. Here’s what I did :
- Started with a central node: “Budget Tracking App”
- Asked FigJam AI: “Generate a mind map for essential features of a personal budget tracking app”
- The AI generated branches for: Income tracking, Expense categories, Bill reminders, Savings goals, Data visualization, Export features
The AI suggestions were surprisingly comprehensive. It even suggested features I hadn’t considered, like recurring transaction templates and budget sharing for couples
Creating User Personas
Next, I used ChatGPT to create detailed user personas. My prompt :
Create 3 detailed user personas for a budget tracking app. Include :
– Demographics (age, occupation, income level)
– Pain points with current budget solutions
– Goals and motivations
– Tech proficiency level
– Key features they need most
The personas helped me prioritize features. For my 48-hour timeline, I focused on the must-haves that would serve all three persona types
Competitor Analysis with Mobbin
Mobbin is a goldmine for app design research. I searched for “budget tracking” and “finance apps” to see what’s already out there. The platform has thousands of app screenshots organized by screen type
I spent about 90 minutes analyzing :
- Onboarding flows (how apps introduce themselves to new users)
- Dashboard layouts (how financial data is displayed)
- Transaction entry forms (the quickest ways to log expenses)
- Navigation patterns (bottom tabs vs. hamburger menus
I took screenshots and organized them in a FigJam board, noting what worked well and what I wanted to improve upon
Defining Core Features
Based on my research, I narrowed down to these essential features for my 48-hour build :
Must-Have Features:
- User registration and login
- Add/edit/delete transactions
- Categorize expenses (food, transport, entertainment, etc.)
- View spending by category
- Monthly budget setting
- Simple dashboard with current month overview
Nice-to-Have (if time permits):
- Charts and graphs
- Recurring transactions
- Budget alerts
- Export to CSV
Deliverable: At the end of Step 1, I had a complete research document with user personas, competitive analysis, feature prioritization, and initial user flow diagrams. This foundation would guide every decision in the next 43 hours
Step 2: App Flow Design with AI (3 Hours)

With my research complete, I moved to mapping out the user journey. Every screen, every tap, every decision the user would make
Generating Flowcharts with FigJam AI
FigJam’s AI can create flowcharts automatically. I used this prompt :
Create a user flow diagram for a budget tracking app with these screens:
– Splash screen → Onboarding → Login/Signup → Dashboard → Add Transaction → Transaction List → Category View → Profile Settings
Show decision points and navigation paths
The AI generated a basic flow, which I then customized to match my specific needs. The automated flowchart saved me at least an hour of manual diagramming
Mapping Key User Journeys
I created separate flows for different user scenarios :
- First-Time User Journey:
- App launch → Onboarding slides → Sign up → Setup monthly budget → Add first transaction → View dashboard
- Returning User Journey:
- App launch → Login (biometric) → Dashboard → Quick actions
- Transaction Entry Journey:
- Dashboard → Tap “Add” → Select category → Enter amount → Add note (optional) → Save → See updated dashboard
These detailed flows helped me identify exactly how many screens I needed to design and build
Screen List Creation
By the end of this step, I had a comprehensive list of required screens:
- Splash screen (1)
- Onboarding screens (3 slides)
- Authentication (Login, Signup, Forgot Password) (3)
- Dashboard (1)
- Add Transaction (1)
- Transaction List (1)
- Transaction Detail/Edit (1)
- Categories Overview (1)
- Profile/Settings (1)
Total: 13 screens to design and build in the remaining time
Deliverable: Complete app flow diagram showing all screens, navigation paths, and user decision points. This became my blueprint for the design phase
For detailed guidance on organizing your design workflow, check out our guide on professional note-taking apps to keep your research and planning documented throughout the process
Step 3: UI Design with Figma AI’s First Draft (8 Hours)
This was the most exciting part. Watching AI generate beautiful app screens in seconds felt like magic
Setting Up Your Figma Project
I created a new Figma file and set up frames for mobile screens :
- iPhone 14 Pro: 393 × 852px
- Android Standard: 360 × 800px
Having both platform sizes helped ensure responsive design from the start
Using Figma AI to Generate Screens
Figma’s AI features (accessed through plugins and Figma AI beta) can generate entire screens based on text descriptions. Here’s my process :
For the Dashboard screen, I used this prompt :
Create a modern budget tracking app dashboard with:
– Header showing current month and total balance
– Circular progress chart showing budget used vs remaining
– List of recent transactions (5 items) with icons, category names, and amounts
– Bottom navigation with Dashboard, Transactions, Categories, Profile icons
– Color scheme: Primary blue (#4A90E2), Secondary green (#50C878) for income, Red (#FF6B6B) for expenses
– Clean, minimal design with plenty of white space
– Card-based layout with soft shadows
The AI generated a screen that was 80% of what I envisioned. I spent the next 30 minutes customizing :
- Adjusting spacing and padding
- Refining the color palette
- Choosing better icons from the Iconify plugin
- Setting up a typography system (headers, body text, captions)
Creating a Design System
Instead of designing each screen from scratch, I built a design system first:
Colors:
- Primary: #4A90E2 (Trust-inspiring blue)
- Success: #50C878 (Income green)
- Error: #FF6B6B (Expense red)
- Background: #F7F9FC (Soft grey)
- Text Primary: #2C3E50
- Text Secondary: #95A5A6
Typography:
- Headers: Inter Bold, 24-32px
- Subheaders: Inter Semibold, 18-20px
- Body: Inter Regular, 14-16px
- Captions: Inter Regular, 12px
Components I Created:
- Button (primary, secondary, outline variants)
- Input fields (text, number, date, dropdown)
- Transaction card
- Category icon buttons
- Bottom navigation bar
AI helped here too. Figma AI can suggest component variants and auto-layout configurations. It saved hours of repetitive work
Designing All 13 Screens
With my design system in place, creating the remaining screens went much faster :
Hour 3-4: Authentication screens (Login, Signup, Forgot Password) Hour 5-6: Transaction screens (Add, List, Detail) Hour 7: Category and Profile screens Hour 8: Onboarding flow and final polish
For each screen, I used AI to generate the initial layout, then customized it to match my design system. The key was having clear, detailed prompts
Screen Examples and Prompts
For the Add Transaction screen:
Create a transaction entry form with :
– Large amount input field at top (numeric keypad)
– Category selection (grid of icon buttons: Food, Transport, Shopping, Bills, Entertainment, Other)
– Date picker (default to today)
– Optional note field
– Save button at bottom (full width, prominent)
– Cancel button in header
– Expense/Income toggle at top
For the Onboarding screens:
Create 3 onboarding slides for budget app :
Slide 1: Welcome screen with app icon, tagline “Take Control of Your Money”, illustration of person with piggy bank
Slide 2: “Track Every Expense” with illustration of receipt/phone, text about easy transaction logging
Slide 3: “Understand Your Spending” with charts/graphs illustration, text about insights
Each with Skip/Next buttons, progress dots at bottom
The AI-generated screens were beautiful and on-brand. Minor tweaks took another 20-30 minutes per screen
Creating Interactive Prototype
Figma’s prototyping features let you link screens together to simulate the app. I connected:
- Onboarding slides with “Next” buttons
- Authentication flow (signup → dashboard, login → dashboard)
- Dashboard actions (tap “Add” → Add Transaction screen)
- Navigation bar (tap icons to switch between main screens)
- Back buttons and cancel actions
The interactive prototype became crucial for testing with friends and identifying UX issues before building
Deliverable: Complete UI design in Figma with 13 polished screens, a comprehensive design system, and an interactive prototype ready to be converted into a real app
To organize all your design files and project documentation, consider using one of the best note-taking apps for 2025 we’ve reviewed on Apps4Review
Step 4: Building the App with FlutterFlow (24 Hours)

This is where the magic happens. Taking your designs and turning them into a functional app
Why FlutterFlow?
After testing several no-code platforms (Adalo, Bubble, Thunkable), I chose FlutterFlow because :
- It generates actual Flutter code (can be customized later)
- Best Figma integration
- Firebase built-in (database, authentication, storage)
- True native apps (not web wrappers)
- Best performance of all no-code tools I tested
- Active community and excellent documentation
Importing Figma Designs (1 Hour)
FlutterFlow has a Figma import feature that’s surprisingly good :
- In Figma, select all frames you want to import
- Copy the Figma file link
- In FlutterFlow, go to “Import from Figma”
- Paste link and select frames
- FlutterFlow converts designs to widgets
The import wasn’t perfect—some spacing needed adjustment, and complex auto-layouts sometimes broke. But it saved hours compared to rebuilding everything from scratch
Pro tip: Before importing, organize your Figma layers with clear naming. FlutterFlow reads layer names as widget names, making it easier to find and edit elements
Setting Up Firebase Backend (2 Hours)
FlutterFlow makes Firebase integration incredibly simple :
- Click “Firebase Setup” in FlutterFlow
- Follow the wizard to create a Firebase project
- FlutterFlow automatically configures authentication and Firestore
Database Structure I Created :
Users Collection:
– userId (auto-generated)
– displayName
– monthlyBudget (number)
– createdAt (timestamp)
Transactions Collection:
– transactionId (auto-generated)
– userId (reference to Users)
– amount (number)
– category (string)
– type (string: “income” or “expense”)
– note (string, optional)
– date (timestamp)
– createdAt (timestamp)
Categories Collection:
– categoryId (auto-generated)
– name (string)
– icon (string)
– color (string)
– type (string: “expense” or “income”)
FlutterFlow’s visual database builder made this easy. I literally drew out the relationships between collections by clicking and dragging
Building User Authentication (2 Hours)
Firebase Authentication handles all the complex security:
- Enable Email/Password authentication in Firebase Console
- In FlutterFlow, add “Login” action to login button:
- Action: Authenticate User
- Email field: [email input field]
- Password field: [password input field]
- Success action: Navigate to Dashboard
- Error action: Show error message
- Similarly set up Sign Up action:
- Action: Create Account
- Email, Password, Confirm Password fields
- Success: Navigate to Dashboard
- Error: Show validation error
- Password Reset:
- Action: Send Password Reset Email
- Email field input
- Success: Show confirmation message
The authentication was working in under 2 hours. Firebase handles all the security, email verification, and password encryption automatically
Building Core Functionality (12 Hours)
This was the longest phase. Making each screen actually work
Dashboard Screen (3 hours):
- Query Firestore for current user’s transactions this month
- Calculate total income, total expenses, remaining budget
- Display recent transactions (limit 5, ordered by date descending)
- Create pie chart showing expenses by category
- Implement pull-to-refresh
Add Transaction Screen (3 hours):
- Create form with validation (amount required, category required)
- Category selection with visual icons
- Date picker (default to today)
- On Save button: Create new document in Transactions collection
- Navigate back to Dashboard and refresh data
Transaction List Screen (2 hours):
- Query all transactions for current user
- Display in list with infinite scroll
- Group by date (Today, Yesterday, This Week, Earlier)
- Tap transaction to view/edit details
- Swipe to delete with confirmation dialog
Edit Transaction Screen (2 hours):
- Load existing transaction data into form
- Allow editing all fields
- Save updates to Firestore
- Delete transaction option
Categories Screen (1 hour):
- Display all expense categories
- Show total spent in each category this month
- Color-coded progress bars
- Tap to see all transactions in that category
Profile Screen (1 hour):
- Display user email
- Set monthly budget (editable)
- Basic settings (coming soon placeholders)
- Logout button (clears session, returns to login)
Adding Polish and Micro-Interactions (3 Hours)
Small details that make the app feel professional:
- Loading spinners when querying database
- Empty states (“No transactions yet. Tap + to add your first expense!”)
- Success messages (Toast notifications)
- Form validation errors (red text below invalid fields)
- Smooth transitions between screens (slide animations)
- Bottom navigation highlighting (current screen indicator)
Testing on Real Devices (3 Hours)
FlutterFlow has a testing app that lets you preview your build instantly:
- Download “FlutterFlow” app from App Store or Play Store
- Scan QR code from FlutterFlow dashboard
- App loads on your phone in seconds
I tested thoroughly:
- Created account
- Logged in and out multiple times
- Added 20+ test transactions
- Edited and deleted transactions
- Checked all navigation flows
- Tested form validation (tried submitting empty forms, invalid emails, etc.)
- Verified database updates in Firebase Console
- Tested on both iPhone and Android devices
Issues I Fixed:
- Date picker didn’t work on Android → Switched to different date picker widget
- Transaction list loaded slowly → Added pagination (load 20 at a time)
- Keyboard covered input fields → Added automatic scroll behavior
- Category icons looked blurry → Replaced with higher resolution assets
Deliverable: A fully functional app running on real devices with all core features working, data persisting to Firebase, and a polished user experience
Step 5: Publishing Your App (8 Hours)
The finish line! Getting your app into the hands of users
Preparing for App Store Submission
Both Apple and Google have specific requirements. Here’s what you need :
App Assets to Create :
- App Icon (1024×1024px)
- Splash Screen
- App Screenshots (multiple sizes for different devices)
- Feature Graphic (1024×500px for Google Play)
- Privacy Policy (required!)
I used Figma to create all visual assets. For the privacy policy, I used a template generator (https://www.privacypolicygenerator.info/) and customized it for my app
App Store Screenshots: I took screenshots of all major features on actual devices, then added marketing text overlays in Figma :
- Track Every Expense” (Dashboard screenshot)
- “Categorize Smartly” (Categories screen)
- “Understand Your Spending” (Transaction list)
- “Set Budget Goals” (Profile with budget setting)
Building Release Version in FlutterFlow
FlutterFlow makes this straightforward :
- Go to “Build” section
- Select “iOS” for App Store build
- Upload App Store Connect credentials
- Hit “Build”
- Wait 20-30 minutes for build to complete
- Download IPA file or deploy directly to TestFlight
Repeat process for Android:
- Select “Android” build
- Generate signing key (FlutterFlow guides you through this)
- Build AAB file
- Download for Google Play upload
Cost Note: Free tier FlutterFlow builds work fine, but paid plans ($30/month) get faster build times and direct store deployment
Submitting to Google Play Store
Google Play is faster and more forgiving:
- Create Google Play Developer account ($25 one-time fee)
- Create new app listing
- Fill out store listing:
- App name: “BudgetFlow”
- Short description (80 chars)
- Full description (4000 chars max)
- Screenshots (min 2, I uploaded 5)
- App icon
- Feature graphic
- Category: Finance
- Content rating: Everyone
- Upload AAB file
- Complete content rating questionnaire
- Set up pricing (Free)
- Add privacy policy URL
- Submit for review
Review Time: Google typically reviews in 1-3 days. Mine was approved in 18 hours !
Submitting to Apple App Store
Apple’s process is more involved:
- Create Apple Developer account ($99/year)
- Create App ID in Apple Developer portal
- Set up App Store Connect listing:
- App name
- Subtitle
- Description
- Keywords (important for search)
- Screenshots (multiple sizes: 6.5″, 5.5″, iPad)
- App icon
- Age rating
- Privacy policy
- Upload build via TestFlight (from FlutterFlow)
- Submit for review with explanation of app purpose
Apple Review Time: Typically 1-3 days. Be prepared for possible rejection and resubmission. Apple is strict about :
- Privacy policy completeness
- Functionality (must match description)
- Design quality
- Use of Apple’s standard UI pattern
My app was initially rejected because I didn’t explain how I handle user data in enough detail. I updated the privacy policy and app description, resubmitted, and was approved 24 hours later
Common Rejection Reasons (and How to Avoid Them)
Google Play:
- Missing privacy policy → Always include one
- Misleading screenshots → Show actual app features
- Broken functionality → Test thoroughly
- Policy violations → Read Play Store policies
Apple App Store:
- Incomplete metadata → Fill out every field
- Low-quality interface → Follow Apple Human Interface Guidelines
- Missing functionality → All features in screenshots must work
- Privacy issues → Clear explanation of data usage
- Crashes → Extensive testing required
Deliverable: Your app live on the App Store and/or Google Play Store, available for download by anyone in the world !
For managing your ongoing app development projects, check out our reviews of time tracking apps to keep your productivity high
Bonus: Monetization Options (After Launch)
Once your app is published, here are ways to generate revenue:
1. In-App Purchases
FlutterFlow supports RevenueCat integration for subscriptions:
- Premium features (export to CSV, advanced charts)
- Remove ads upgrade ($2.99 one-time)
- “Pro” subscription tier ($4.99/month)
2. Advertising
Integrate AdMob (Google’s ad platform):
- Banner ads on dashboard (least intrusive)
- Interstitial ads (after certain actions)
- Rewarded video ads (watch ad to unlock feature)
Expected Revenue: For a finance app with 1,000 active users:
- Ad revenue: $50-200/month
- In-app purchases (3% conversion): $150-300/month
3. Affiliate Partnerships
Partner with financial services:
- Credit card recommendations
- Investment platform referrals
- Budgeting course promotions
4. White Label Licensing
License your app to financial advisors or companies:
- Custom branding
- Client-specific features
- Recurring license fees ($99-299/month per client)
Tools Comparison Table
Here’s how the major tools compare for building your app:
| Tool | Best For | Ease of Use | Cost (Monthly) | Export Code | Native Apps | Database |
| FlutterFlow | Professional apps | Medium | $0-30 | Yes (Flutter) | iOS, Android | Firebase |
| Adalo | Beginners | Easy | $0-36 | No | iOS, Android | Built-in |
| Bubble | Web apps | Hard | $0-29 | No | Web only (PWA) | Built-in |
| Thunkable | Learning | Medium | $0-13 | Limited | iOS, Android | Firebase/Airtable |
| Glide | Quick prototypes | Very Easy | $0-25 | No | PWA only | Google Sheets |
Platform Recommendations
Choose FlutterFlow if: You want professional-quality native apps, need Figma integration, plan to scale, or want to own the code
Choose Adalo if: You’re a complete beginner, need something simple, want drag-and-drop simplicity, or building an MVP quickly
Choose Bubble if: You’re building a web app (SaaS), need complex logic, want unlimited customization, or don’t need mobile native
Choose Thunkable if: You’re learning programming concepts, need block-based logic, or want educational approach
Choose Glide if: You need the fastest possible build time, working with existing data in Sheets, or building internal tools
Real Results: Time and Cost Breakdown
Here’s exactly how I spent my 48 hours :
Time Investment
| Phase | Hours | Tasks |
| Research & Planning | 4 | User research, competitive analysis, feature definition |
| Flow Design | 3 | User flows, wireframes, screen mapping |
| UI Design | 8 | Design system, 13 screens, prototyping |
| App Building | 24 | Import designs, build functionality, database setup |
| Testing & Refinement | 6 | Device testing, bug fixes, polish |
| Store Submission | 3 | Asset creation, listings, submission |
| Total | 48 |
Cost Breakdown
Option 1: Free Tier (Total: $25)
- FigJam AI: Free (limited features)
- Figma: Free (3 projects)
- FlutterFlow: Free (test builds only)
- Firebase: Free (Spark plan, 10k reads/day)
- Google Play Developer: $25 one-time
Option 2: Premium Tools (Total: $162)
- Figma Professional: $12/month
- FlutterFlow Standard: $30/month
- Firebase: Free (will scale later)
- Google Play Developer: $25 one-time
- Apple Developer: $99/year (optional)
Option 3: Full Professional (Total: $269)
- All premium tools above
- Plus: Mobbin Pro ($10/month)
- Plus: ChatGPT Plus ($20/month)
- Plus: Additional plugins and assets
Performance Metrics (After 30 Days)
- App size: 18MB (iOS), 22MB (Android)
- Initial load time: 1.2 seconds
- Database queries: Average 200ms response
- Crash-free rate: 99.1%
- User retention (Day 7): 42%
- Average session length: 3.2 minutes
- Daily active users: 87 (from soft launch to friends/family)
Lessons Learned & Pro Tips
After completing this 48-hour challenge, here’s what I learned :
What Worked Well
- AI-generated designs saved hours – Let AI do the first 80%, then customize the final 20%
- Design system first – Creating reusable components made subsequent screens much faster
- FlutterFlow’s Figma import – Not perfect, but saved significant time
- Firebase integration – Backend setup that would take weeks took 2 hours
- Testing early and often – Caught bugs when they were easy to fix
What I’d Do Differently
- Start with simpler features – I cut several features mid-project to meet the deadline
- Learn FlutterFlow basics first – I spent the first 2 hours of building phase learning the tool
- Prepare assets earlier – Store submission prep could have been done during development
- Use more AI prompts – I manually designed some screens that AI could have generated
- Plan database structure better – Made schema changes mid-build that required rework
Common Mistakes to Avoid
Design Phase:
- Don’t skip the research phase (tempting when you’re excited to design)
- Don’t design features you won’t have time to build
- Don’t ignore mobile design constraints (thumb zones, safe areas)
Build Phase:
- Don’t customize everything – Use default widgets when possible
- Don’t forget to test on real devices (emulators miss issues)
- Don’t ignore performance from the start (harder to fix later)
- Don’t skip user authentication security (Firebase handles this well)
Publishing Phase:
- Don’t submit without thorough testing (rejection delays launch)
- Don’t use placeholder text in store listings (looks unprofessional)
- Don’t forget privacy policy (required, and reviewers check)
- Don’t expect instant approval (plan for 2-5 days review time)
Quick Wins for Faster Development
- Use Figma templates – Start with existing mobile app design templates
- Copy proven UX patterns – Don’t reinvent navigation or form layouts
- Use Firebase authentication – Don’t build your own login system
- Leverage FlutterFlow marketplace – Pre-built components and templates
- Use AI for content – ChatGPT for button labels, error messages, help text
Next Steps: Scaling Your App
Once your MVP is live, here’s how to grow:
Week 1-2: Initial Launch
- Share with friends and family
- Post in relevant online communities (Reddit, Discord, Facebook groups)
- Gather user feedback
- Fix critical bugs
- Monitor Firebase usage
Week 3-4: Iteration
- Analyze user behavior in Firebase Analytics
- Implement most-requested features
- Improve onboarding based on drop-off points
- Add social sharing features
- Create help documentation
Month 2-3: Growth
- App Store Optimization (keywords, screenshots)
- Content marketing (blog posts, tutorials)
- Social media presence
- Influencer outreach
- Consider paid advertising
Month 3-6: Monetization
- Implement chosen revenue model
- A/B test pricing
- Add premium features
- Build email list
- Create content ecosystem (blog, YouTube, newsletter)
Month 6+: Scaling
- Hire developers to add custom features
- Export and modify Flutter code
- Build advanced features AI tools can’t handle
- Expand to additional platforms (web, tablet)
- Build API for integrations
Downloadable Resources
- Hour-by-hour schedule
- Tool setup checklist
- Design handoff checklist
- Pre-submission checklist
- Testing scenarios list
Figma Templates
- Mobile app design system
- 20+ common screen templates
- Component library
- Color palette generator
FlutterFlow Starter Project
- Pre-configured Firebase setup
- Authentication flows ready
- Common widgets library
- Database structure templates
Store Submission Guides
- Apple App Store requirements
- Google Play Store requirements
- Asset size specifications
- Rejection response templates
Conclusion: You Can Do This Too
Building a mobile app in 48 hours seemed impossible before I started. But with AI tools handling the heavy lifting—design generation, code creation, backend setup—it’s entirely achievable
The key is realistic expectations. This won’t be the next Instagram. But it will be:
- A functional app that solves a real problem
- Published on actual app stores
- A valuable learning experience
- A portfolio piece you can show
- Potentially the start of something bigger
Whether you’re an entrepreneur testing an idea, a designer expanding your skills, or simply someone who’s always wanted to build an app, this is your moment. AI has democratized app development. The tools are here. The only question is: what will you build?
Start today. Dedicate one weekend. Follow this guide. And 48 hours from now, you could be holding your phone, looking at your own app in the App Store.
What app will you build? Share in the comments below! I’d love to see what the community creates using this process
Frequently Asked Questions
Q: Do I really need zero coding experience? A: Yes! I’m not a developer. If you can use Figma and follow step-by-step instructions, you can do this
Q: Can I really do this in 48 hours? A: With focus and the right tools, yes. It’s intense, but achievable. Budget 48 hours over a long weekend
Q: What if I get stuck? A: FlutterFlow has excellent documentation and an active community forum. ChatGPT can also help troubleshoot issues
Q: Can I make money from this app? A: Yes! Through ads, in-app purchases, or subscriptions. Don’t expect to get rich immediately, but revenue is possible
Q: Will this scale to thousands of users? A: Firebase and FlutterFlow scale well. The free Firebase tier handles up to 10,000 users. Paid plans scale indefinitely
Q: What happens after the free FlutterFlow trial? A: You can export the Flutter code and continue development independently, or subscribe to FlutterFlow’s paid plans
Q: Is this better than hiring a developer? A: For MVPs and learning, yes. For complex, custom apps, you’ll eventually want developer help
Q: Can I sell this app/template? A: Yes! Many people build template apps and sell them on marketplaces or license them to businesses
Related Articles:
- Best Note-Taking Apps in 2025
- Time Tracking Apps for Productivity
- Project Management Tools for Small Teams